


Set Up Your Massage Social Media Accounts
It’s important to get your massage social media accounts set-up with your new business name as soon as possible. There is nothing more frustrating than to get your business all set up and then realize someone is already using your name on Facebook or one of the other important social media sites.
Quick and Easy First Step
It only takes a few minutes to reserve your business name before someone else takes it. Below you will find step by step instructions on how to initially set up some of the most used social media business accounts. This is not a complete set-up guide but just the first step that you should take right away. Later, you can check out our complete how-to guides when you are ready to set up your entire sites.
Set up your massage social media accounts

Facebook
In this short step by step tutorial, you will set up your Facebook account and reserve your unique name. This is not a full set up of your business page. We will help you do this in a future tutorial, or you can venture on your own.
Set-Up Your Massage Social Media Accounts: Facebook
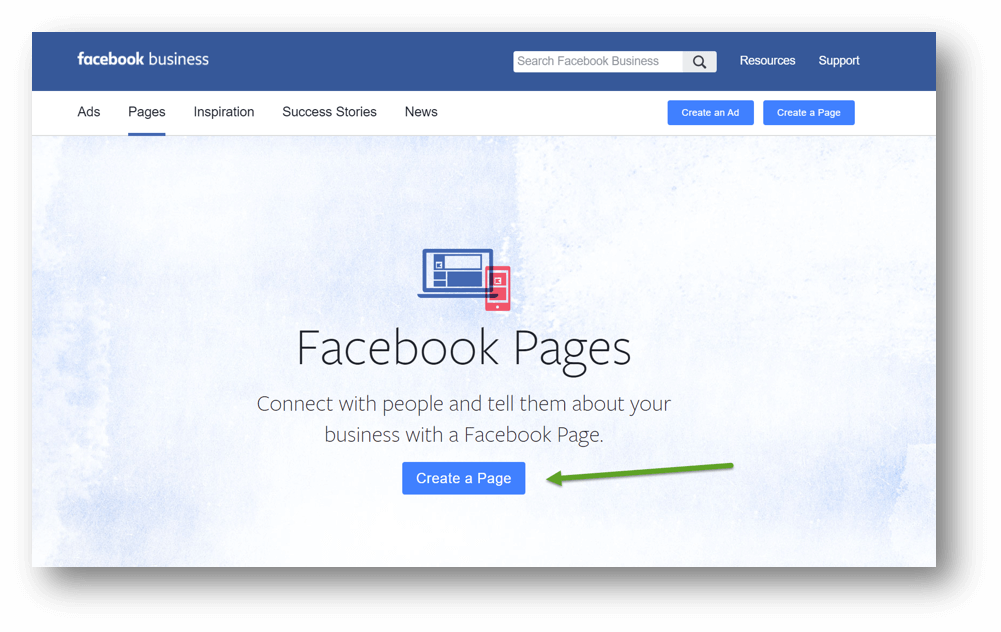
Facebook Set-Up Step 1: Click here to start. Click on ‘Create Page’.
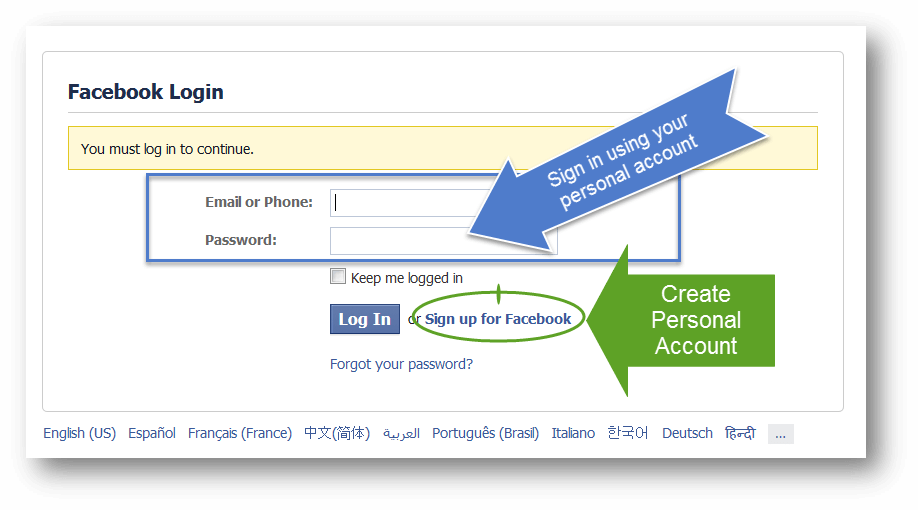
Step 2: Sign into your personal Facebook account.
If you don’t have a personal account yet, you need to create one and then you will be able to create your business page.
*
*Step 3: Choose Your Business Page Type.
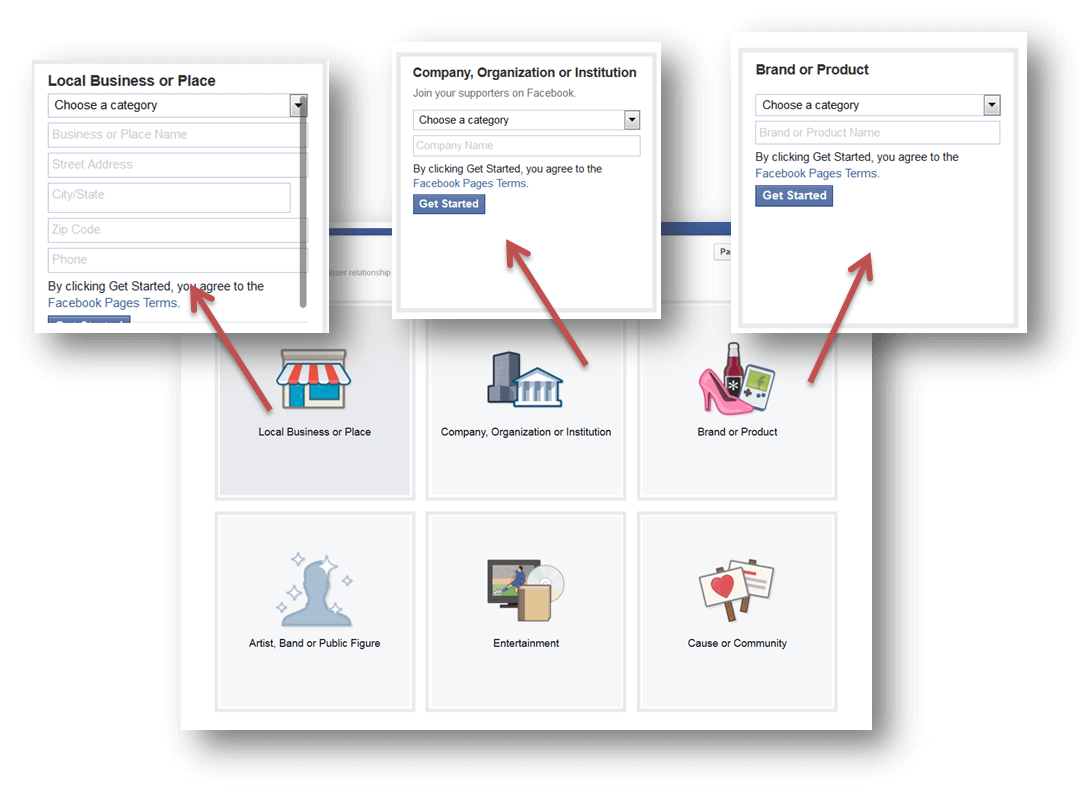
- Local Business: Choose this if you have a business location*.
- Company: Most therapists will choose this one if they don’t have their own location.
- Brand: You can use this business type if you want. Don’t stress if you’re unsure. You can change this at any time in the future.
*A business location must be yours and not a shared location. If you are renting a room, you need to have your own suite # to be considered a separate business.
*
*
Step 4: Choose Your Category and Enter Your Business Name
Depending on the type of account you choose, you will then be prompted to enter your business name and category. In the example to the right, we have chosen the ‘Company’ business type and Health/Beauty for the category.

*
*
*Step 5: Enter Description, Domain Name, and Unique Name.
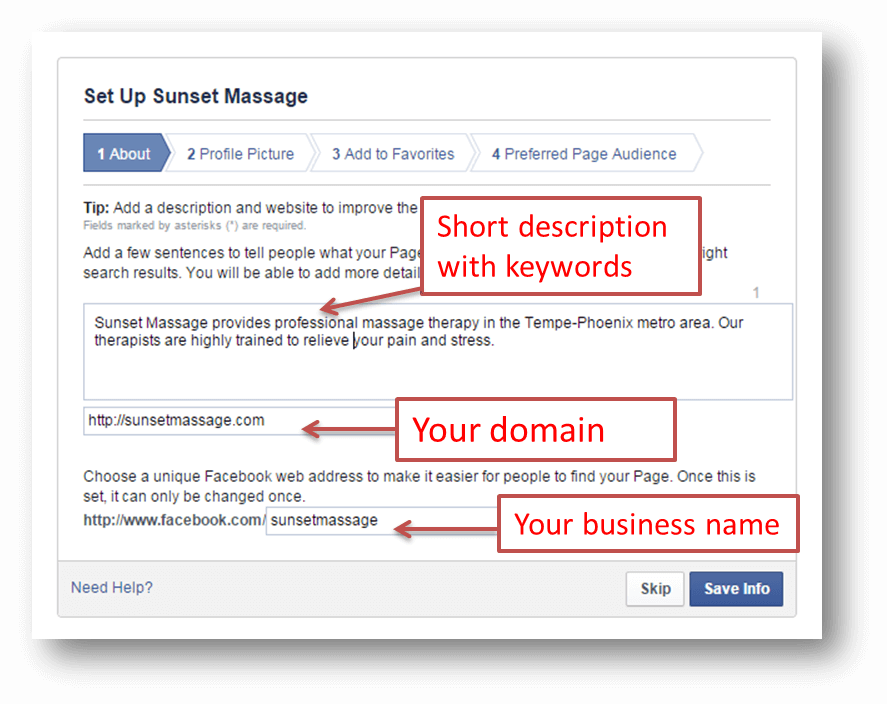
- Description: This short description should contain the keywords for your business, so customers can find you. In the example, the keywords used are Sunset Massage, Massage Therapy, Tempe/Phoenix, Pain, Stress.
- Enter Your Business Domain.
- Enter Your Unique Name: Use your business name. This will show up in the URL for your page*. Example: www.facebook.com/sunsetmassage.
- Make sure you hit the blue ‘Save Info’ button to save your changes.
*Warning: You can only change this unique name once, so make sure it is what you want.
*
Success Key: You are now finished registering your page. You can choose to push on if you want to set up the rest of your page. If you want to do it later, I recommend keeping your page unpublished until you are ready to finish it. To do this, go to ‘Settings’ and then ‘Page Visibility’. Click the edit button, and check the ‘Unpublish Page’ button. Save your changes.
Tip: You can access your business page from your personal account by clicking on the link in the left sidebar under ‘pages’.
Congratulations! You have completed the initial set up of your Facebook Business Page

Google+
Google+ is a very important social media site to set up because in increases your chances of your business being found by new customers. Google+ is connected to ‘Google Search’, ‘Google Maps’ and ‘Google Local’ through ‘Google My Business’.
Set-Up Your Massage Social Media Accounts: Google+
Step 1: Create A Business Gmail Account
Google+ requires you to have a Gmail account. I don’t recommend using your personal Gmail account, so your first step should be to create a business Gmail account.
I recommend using your business domain name for your email account, such as mary@yourmassagebiz.com. ‘G Suite’ is Google’s set of business apps that allows you to do this. Check it out here.
Related Article: Best Massage Business Tools: G Suite
Set Up Your Google+ Account
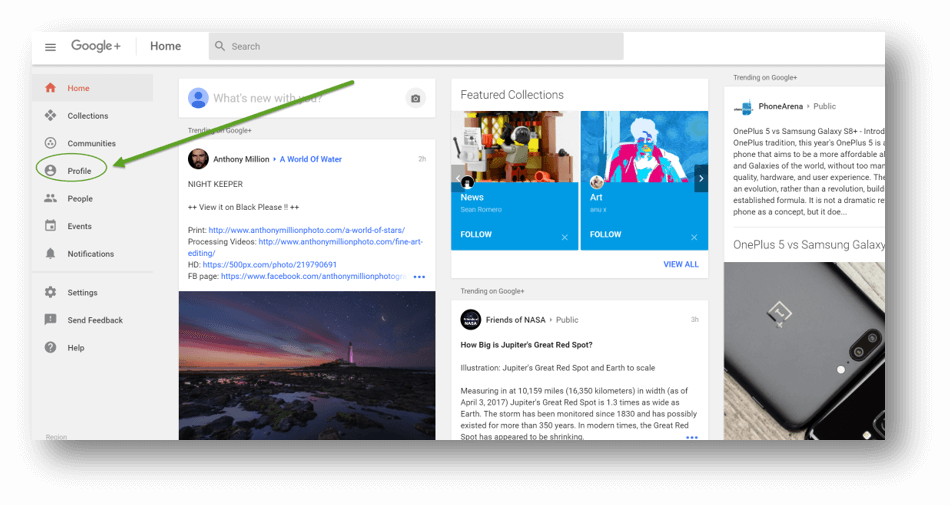
Step 1: Open Google+
Within your Google email (Gmail) account, click on the grid icon in the top right corner. This will open the Google apps window. Click on the Google+ icon to open your account. You can also get to it by opening a new browser tab and typing ‘plus.google.com’ into the address window.

Step 2: Join Google+
Click on the ‘Join Google+’ link on the left.

Step 3: ” Google+ For Your Brand’
Click on ‘Goggle+ for your Brand’.
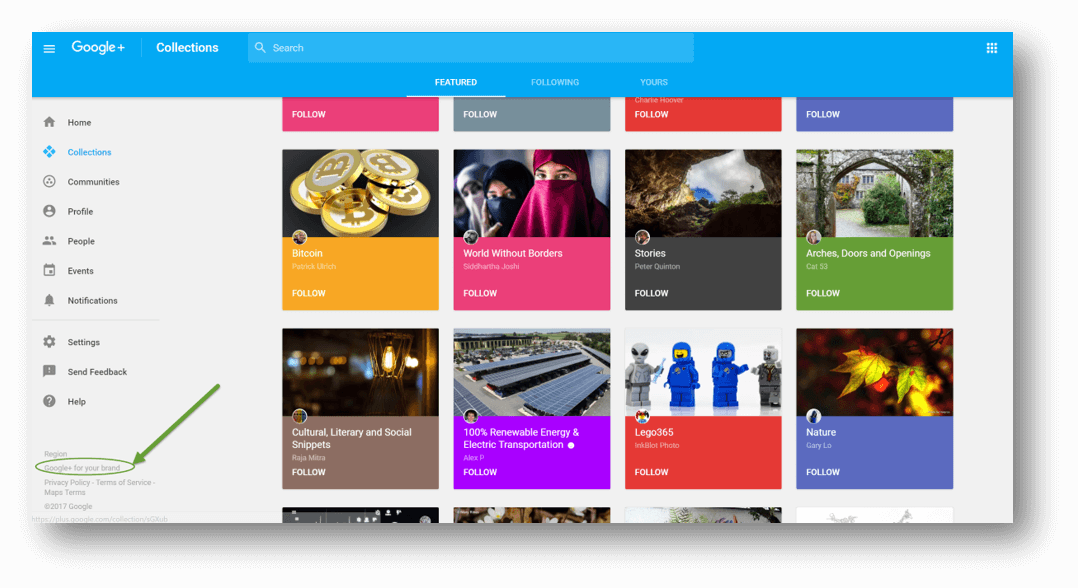
Massage Social Media Accounts
Step 4: Get Started
Click on the red ‘Create Google+ Page‘ button.

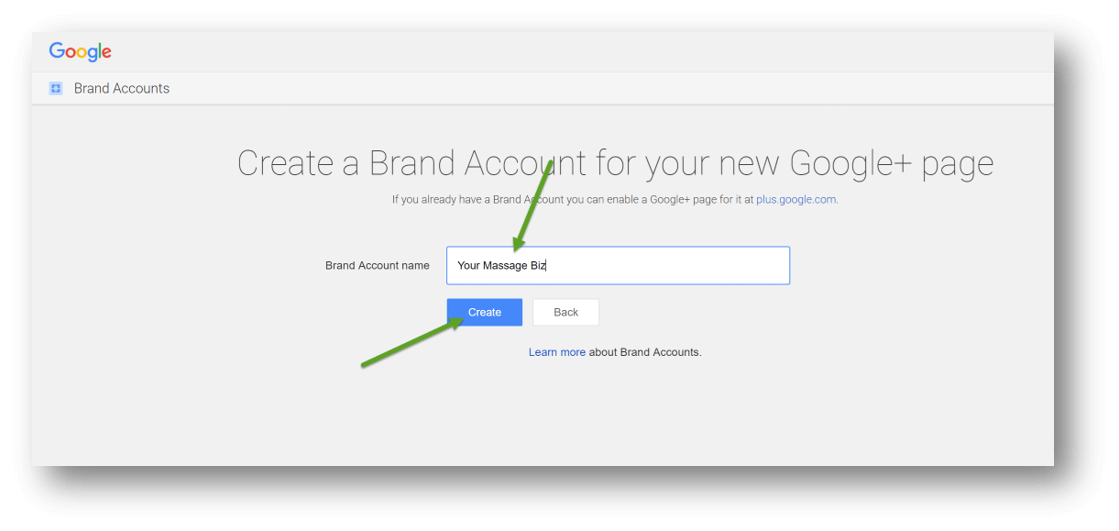
Step 5: Create a Brand Account
Enter your business name and click create.
*
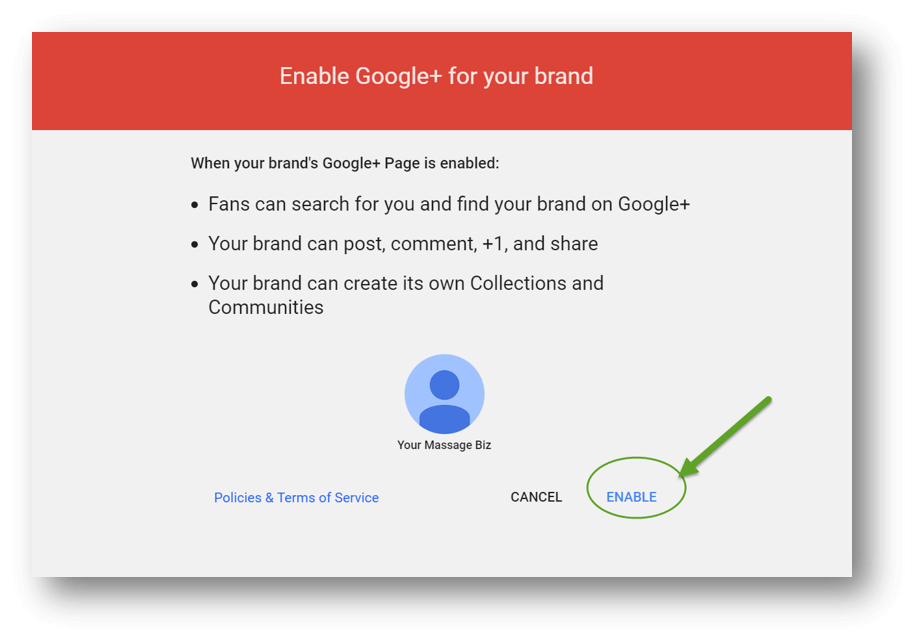
Step 6: Enable Google+ for your brand
Click on the ‘Enable’ link.
*
Step 7: Access your profiles
Click on the icon in the top right corner to access your profiles.

Step 8: Your Personal and Business Pages
You can access your personal and business pages from this drop-down.

Step 9: Manage Your Account
Click on the ‘Manage account’ button for your business page.

Step 10: Access the Back-end of your Business Page
Click on the red G+ icon to go to the back-end of your business page.

Step 11: Your Business G+ Account
This is the back-end of your business page and where you will do most of your work.
Click on the profile link to access the front-end of your business page.
*
Step 12: What Everyone Will See
This is the front-end of your Google+ page and what everyone will see.
Click on the ‘Edit Profile’ button to edit the page.

Step 13: Edit Your Page
You can edit what people will see on this page. Add a tag-line, cover and profile images for your business.

Congratulations! You have successfully set up your Google+ business page.
Important Additional Steps:
-
Add your profile and cover images to your page.
- Tip: Use the templates on Canva.com to quickly and easily create these images.
-
Set up your ‘Google My Business’ account.
- It’s very important to set up your ‘Google My Business’ account for the overall success of your business. This is how potential customers will find you. It also connects with your Google+ page and allows you to add additional information about your business. Click here to get started.

Twitter
Time to set up your Twitter account now and get your business handle or username: @yourmassagebiz. Again, this tutorial is just a quick set-up of your business page with more help coming in a future article.
Set-Up Your Massage Social Media Accounts: Twitter
*Twitter Set-Up Step 1: Do not use your personal twitter account.
Make sure you sign out of your personal account first before creating your new business account. If you have been using twitter personally, it’s a good idea to set up a separate business account. There are several reasons for this, but the main one is that you don’t want your clients seeing your personal tweets that you send to friends and family.
Step 2: Type twitter.com/signup into your browser address window.

- Enter your business name: You want to use your business name here.
- Enter your email: This should be your business email, so you can keep up to date on what is going on with your business Twitter account. You can set up notifications that will let you know when someone follows you.
- Enter a secure password: It’s a good idea to use a combination of letters, numbers and symbols.
Step 3: Enter Your Phone Number.
In order to keep Twitter safe, you are asked to enter your phone number. When you click ‘next’, Twitter will then send you an SMS text message with a code. You can skip this step if you want.

Step 4: Verify Your Phone
After completing the last step, Twitter should have sent a code to your phone. Enter it here and hit the blue button to ‘Verify’ your phone number.

Step 5: Select Your Username
Now the fun part. This is where you choose your username. Your username is what everyone will see, so it is a good idea that you use your business name. You can get creative, but I recommend keeping it as short as possible and having the word ‘massage’ in it. You can use up to 15 characters.
- Example One: If your business name is ‘Sunset Massage,’ then your username would be @sunsetmassage.
- Example Two: If your name is ‘Mary Richards Sports Massage,’ you might use @mrsportsmassage or @richardsmassage.
Step 6: Following People
The next step involves following other Twitter accounts and it is a great way to start spreading the word about your new business. Following family and friends is a good first step, and they can be a powerful source to spread the word and grow your following. You can also look for other businesses in your local area that compliment your business. Health related and wellness businesses are possibilities.
Warning: Be careful that you don’t get too carried away with this at first . Twitter looks at who follows you back. You need to have some of the accounts that you follow want to follow you back or Twitter will get suspicious and may shut your account down.
Step 7: Profile Picture
This image will be on your profile page and will also show up beside every tweet you post. It should look good at any size. Using your logo is a good idea but sometimes it won’t fit and you may need to modify it.
The recommended image size is 400×400 pixels. The image is automatically resized to fit.
Key To Success: There is a website called Canva.com that is great for creating your profile image. They have a template for the Twitter profile image that will allow you to create a great looking picture for your account. It’s fast, easy, and free if you use your own images.
Step 8: Confirm Your Account
Make sure you go to your email account and confirm your Twitter registration.
Congratulations! You are now finished registering your page and securing your business Twitter handle. You can choose to push on if you want to set up the rest of your page or come back to it at a later time.
You have now completed setting up three of your massage social media accounts.
Set-Up Your Massage Social Media Accounts
Conclusion:
When you are starting your business, there are lots of things to take care of to ensure your best chances at success. One of the important steps for you to do right away is to get your massage social media accounts set up. You can complete your business pages later, but getting your initial account open and your business name reserved should be done now before someone else takes it.
Note: Facebook, Twitter and the other social media companies are continuously updating their set up procedures and it is difficult to keep things up to date on my end. Please, use the comments section at the bottom of this page to alert me of any changes so I can update this article. I would appreciate it. Thank you.
I hope you found these step-by-step guides helpful. Please, leave a comment below and let me know how it went. If you want to spread the word, please, share this article on Facebook, Twitter, or on one of your favorite social media sites. I wish you success and prosperity.
Set Up Your Massage Social Media Accounts


